2022. 1. 14. 15:47ㆍReact Native/Basic

5. [Stack] Header Bar 설정
헤더바의 이름이나 색상 등을 바꿀 수 있는 방법에 대해 알아보자.
<Stack.Screen
    name="Home"
    component={HomeScreen}
    options={{title: 'Home Screen'}}
/>
App.js에서 정의된 스크린에 options라는 프로퍼티를 주고 title이라는 값을 주면 헤더바의 글자를 바꿀 수 있다. 이렇게 하면 초기값으로 헤더 타이틀을 지정할 수 있지만, 그 후에도 임의로 조정 가능하다.
아래 코드처럼 this.props.navigation.setOptions를 통해 헤더바의 설정을 바꿀 수 있다. 글자 뿐 아니라 글자색과 배경색을 바꿀 수도 있다.
<Button
  title="Change the title"
  onPress={() => {
    this.props.navigation.setOptions({
      title: 'Changed!!!',
      headerStyle: {
        backgroundColor: 'pink',
      },
      headerTintColor: 'red',
    });
  }}
/>
이런 옵션 설정은 초기화로도 사용할 수 있다.
<Stack.Screen
  name="User"
  component={UserScreen}
  initialParams={{
    userIdx: 50,
    userName: 'Gildong',
    userLastName: 'Go',
  }}
  options={{
    title: 'User Screen',
    headerStyle: {
      backgroundColor: 'pink',
    },
    headerTintColor: 'red',
    headerTitleStyle: {
      fontWeight: 'bold',
      color: 'purple',
    },
  }}
/>
headerTitleStyle 객체에 fontWeight와 color를 통해 헤더 타이틀의 글자 굵기와 색을 지정할 수도 있다.
그런데 여기서 한 가지 질문이 생기는데 그럼 headerTitleStyle에 정의된 color와 headerTintColor 간의 차이는 뭘까?
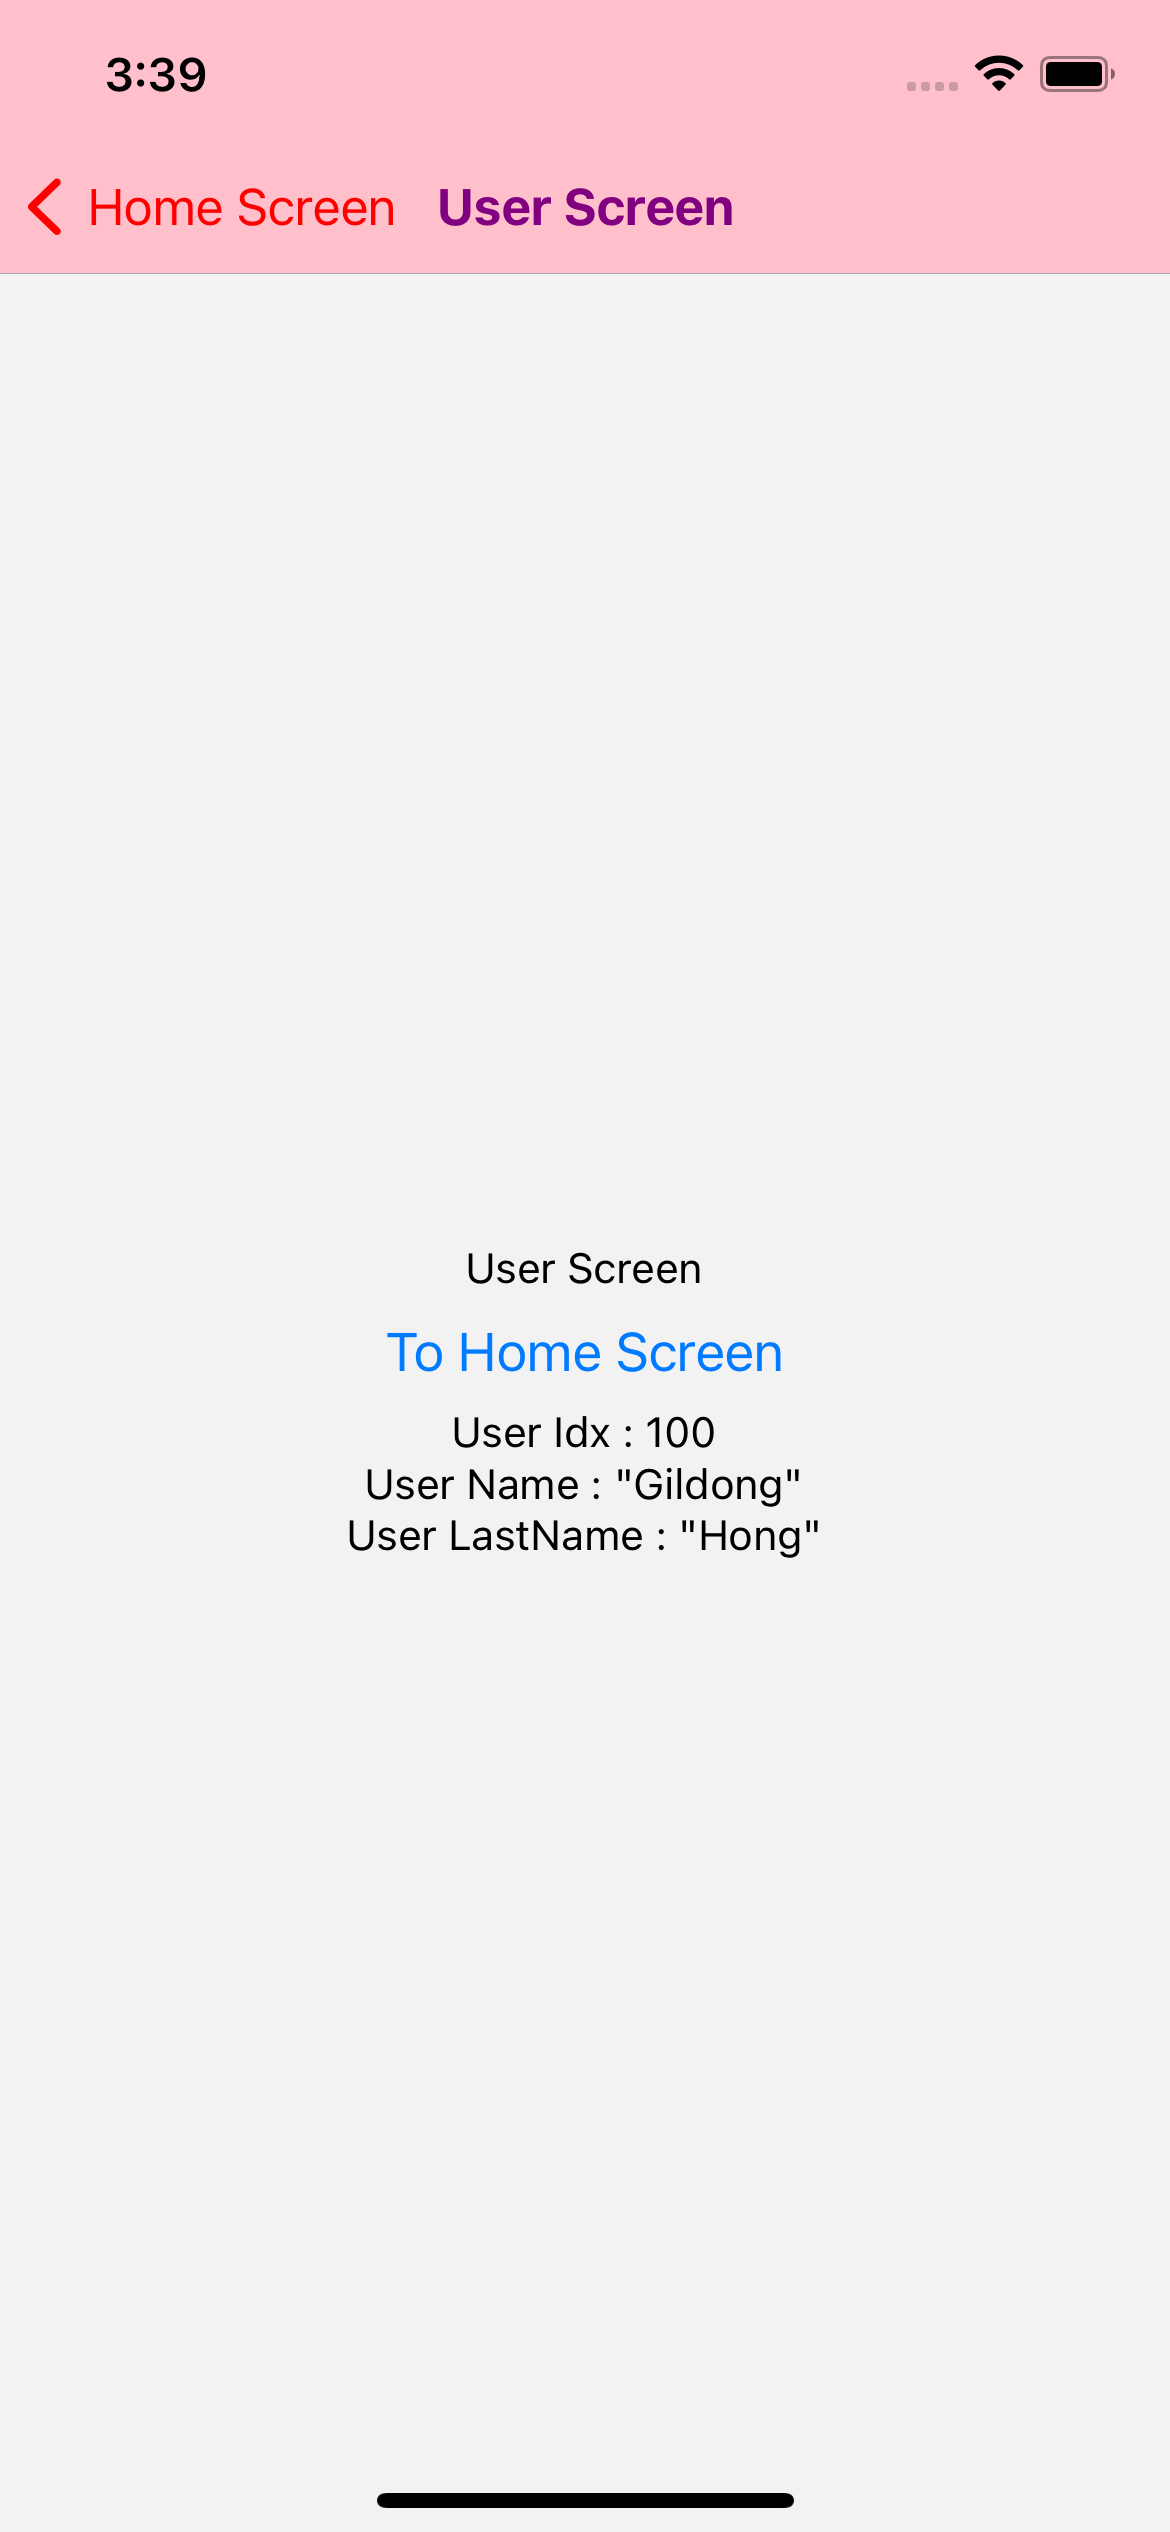
아래 코드 실행 결과 화면을 보면 알 수 있다.
이전 화면으로 돌아가기 위해 만들어진 버튼의 색이 headerTintColor, 헤더 타이틀 글자색이 headerTitleStyle에 정의된 color다.

만약 Stack Screen 이 너무 많고 App.js에서 모든 화면에 대한 옵션 설정을 하는 게 너무 길고 장황하면 각 스크린을 구성하는 js 파일에서 설정할 수도 있다. headerStyle이라는 함수를 스크린 안에서 정의하고 this.headerStyle(); 을 써주면 된다.
class UserScreen extends Component {
  headerStyle = () => {
    this.props.navigation.setOptions({
      title: 'Customizing',
      headerStyle: {
        backgroundColor: 'blue',
      },
      headerTintColor: 'yellow',
      headerTitleStyle: {
        fontWeight: 'bold',
        color: 'green',
      },
    });
  };

  render() {
    this.headerStyle();
    /*
     ... 코드 생략 ...
     */
  }
}
그런데 헤더 스타일을 모든 화면에서 동일하게 가져가고 싶다면 이런 방식은 비효율적이다. 다음 글은 이 방법에 대해 다룬다.
home.js
/**
 * Sample React Native App
 * https://github.com/facebook/react-native
 *
 * @format
 * @flow strict-local
 */

import React, {Component} from 'react';
import {StyleSheet, Text, View, Button} from 'react-native';

import {NavigationContainer} from '@react-navigation/native';
import {createNativeStackNavigator} from '@react-navigation/native-stack';

class HomeScreen extends Component {
  render() {
    return (
      <View
        style={{
          flex: 1,
          alignItems: 'center',
          justifyContent: 'center',
        }}>
        <Text>Home Screen</Text>
        <Button
          title="To User Screen"
          onPress={() => {
            this.props.navigation.navigate('User', {
              userIdx: 100,
              userName: 'Gildong',
              userLastName: 'Hong',
            });
          }}
        />
        <Button
          title="Change the title"
          onPress={() => {
            this.props.navigation.setOptions({
              title: 'Changed!!!',
              headerStyle: {
                backgroundColor: 'pink',
              },
              headerTintColor: 'red',
            });
          }}></Button>
      </View>
    );
  }
}

const styles = StyleSheet.create({});

export default HomeScreen;
user.js
/**
 * Sample React Native App
 * https://github.com/facebook/react-native
 *
 * @format
 * @flow strict-local
 */

import React, {Component} from 'react';
import {StyleSheet, Text, View, Button} from 'react-native';

import {NavigationContainer} from '@react-navigation/native';
import {createNativeStackNavigator} from '@react-navigation/native-stack';

class UserScreen extends Component {
  headerStyle = () => {
    this.props.navigation.setOptions({
      title: 'Customizing',
      headerStyle: {
        backgroundColor: 'blue',
      },
      headerTintColor: 'yellow',
      headerTitleStyle: {
        fontWeight: 'bold',
        color: 'green',
      },
    });
  };

  render() {
    this.headerStyle();
    const {params} = this.props.route;
    const userIdx = params ? params.userIdx : null;
    const userName = params ? params.userName : null;
    const userLastName = params ? params.userLastName : null;

    return (
      <View
        style={{
          flex: 1,
          alignItems: 'center',
          justifyContent: 'center',
        }}>
        <Text>User Screen</Text>
        <Button
          title="To Home Screen"
          onPress={() => {
            this.props.navigation.navigate('Home');
          }}
        />
        <Text>User Idx : {JSON.stringify(userIdx)}</Text>
        <Text>User Name : {JSON.stringify(userName)}</Text>
        <Text>User LastName : {JSON.stringify(userLastName)}</Text>
      </View>
    );
  }
}

const styles = StyleSheet.create({});

export default UserScreen;
App.js
/**
 * Sample React Native App
 * https://github.com/facebook/react-native
 *
 * @format
 * @flow strict-local
 */

import React, {Component} from 'react';
import {StyleSheet, Text, View} from 'react-native';
import {NavigationContainer} from '@react-navigation/native';
import {createNativeStackNavigator} from '@react-navigation/native-stack';
import HomeScreen from './src/home';
import UserScreen from './src/user';

const Stack = createNativeStackNavigator();

class App extends Component {
  render() {
    return (
      <NavigationContainer>
        <Stack.Navigator initialRouteName="Home">
          <Stack.Screen
            name="Home"
            component={HomeScreen}
            options={{title: 'Home Screen'}}
          />
          <Stack.Screen
            name="User"
            component={UserScreen}
            initialParams={{
              userIdx: 50,
              userName: 'Gildong',
              userLastName: 'Go',
            }}
            // options={{
            //   title: 'User Screen',
            //   headerStyle: {
            //     backgroundColor: 'pink',
            //   },
            //   headerTintColor: 'red',
            //   headerTitleStyle: {
            //     fontWeight: 'bold',
            //     color: 'purple',
            //   },
            // }}
          />
        </Stack.Navigator>
      </NavigationContainer>
    );
  }
}

const styles = StyleSheet.create({});

export default App;
참고 자료
iOS/Android 앱 개발을 위한 실전 React Native - Basic - 인프런 | 강의
Mobile App Front-End 개발을 위한 React Native의 기초 지식 습득을 목표로 하고 있습니다. 진입장벽이 낮은 언어/API의 활용을 통해 비전문가도 쉽게 Native Mobile App을 개발할 수 있도록 제작된 강의입니다
www.inflearn.com
'React Native > Basic' 카테고리의 다른 글
| [React Native] React Navigation - 7. [Stack] Header Bar 커스터마이징 (0) | 2022.01.17 |
|---|---|
| [React Native] React Navigation - 6. [Stack] 여러 화면에 공통 Style 적용 (0) | 2022.01.14 |
| [React Native] React Navigation - 4. [Stack] Navigation Params (0) | 2022.01.14 |
| [React Native] React Navigation - 3. [Stack] 화면 Linking (0) | 2022.01.13 |
| [React Native] React Navigation - 2. React Navigation 설치 (0) | 2022.01.12 |